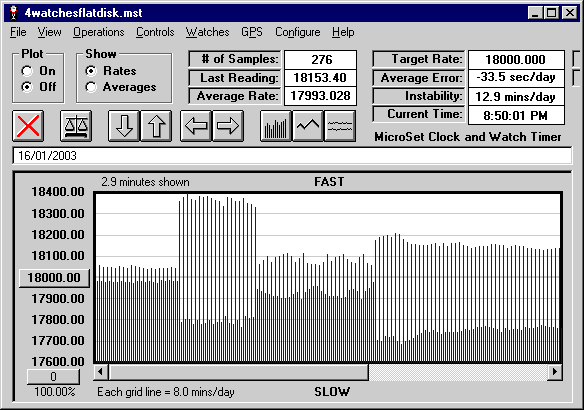
MicroSet will measure watches with a high degree of accuracy. But because the watch tick is a complex combination of sounds, it’s very important to get the sensor positioned properly and the Level Control set correctly. If you don’t get these settings right, the readings will appear jumpy and inaccurate.
It’s easiest to get the setup correct if you have the computer interface software. If you don’t have the computer software, you should set MicroSet to the Beat Error Mode. If you’re getting clean tick signals, the beat error readings will be regular. If the readings are not clean, the beat error will seem to jump around. Change the Level control from minimum to maximum (and settings in between) to find where the readings are stable. If you’re using the clip-on sensor, try moving it to different places on the watch.
The computer software will allow you to display the tick on the computer screen and clearly see when the readings are “clean”. There is a special setup that will make this possible. You should set MicroSet to read every beat. In other words, set MicroSet to “Time: 1”. Ordinarily it’s a bad idea to meaure an odd number of beats. But “Time: 1” is a special case because it shows you every beat.
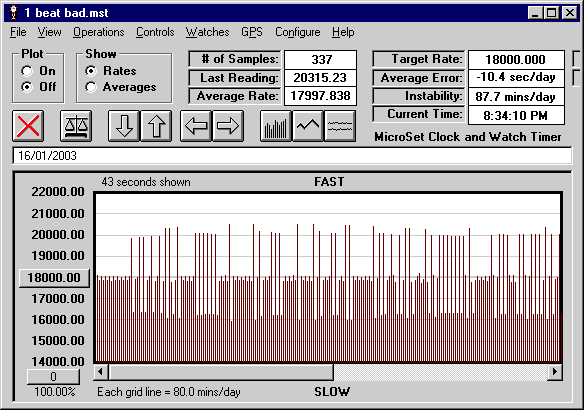
In the example below, MicroSet is measuring every beat of a small ladies wrist watch. The readings from this watch are irregular. This is not good. MicroSet is triggering on different parts of the tick at different times. You need to change the location of the sensor or change the Level Control.
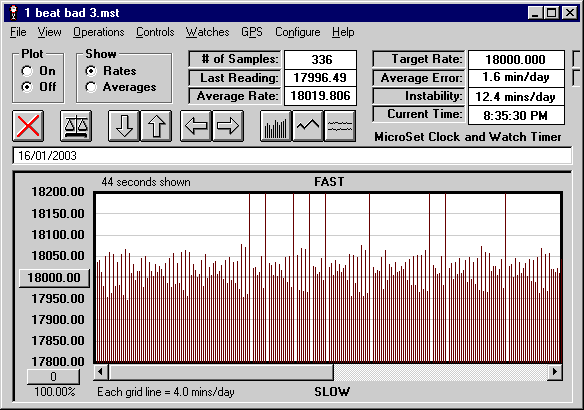
In the next sample, the readings are different, but they’re still irregular. This setup is no good either. You need to change the sensor or the Level Control.
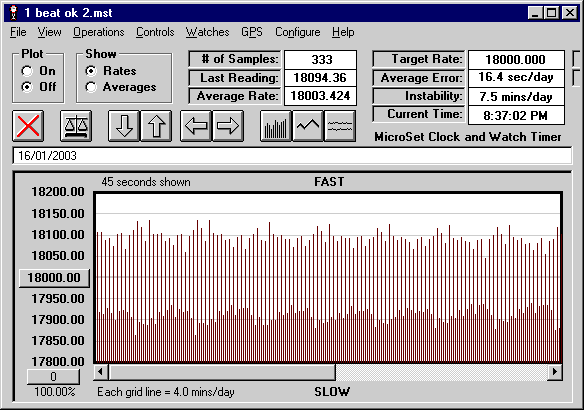
In the graph below, the readings are regular. This is a good setup that will give you good results. One reading is tall, the next one is short. The difference between the two is the beat error of this watch. There will always be some beat error, and this jig-jog is what you can expect to see when you have the settings correct.
Once you have MicroSet configured to give regular readings of single beats, you can set it to time longer beat counts. In the graph below, once the watch was reading well on “Time: 1”, MicroSet was changed to “Time: 10”. Now the readings are nearly flat and accurate.
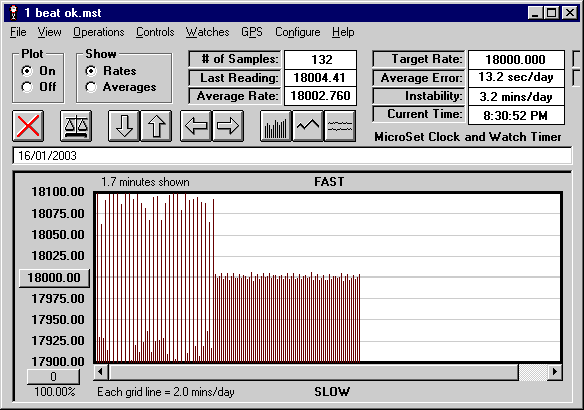
Different watches may require different settings, but you ought to be able to get them all to show the regular pattern with MicroSet set to “Time: 1”. In the graph below, four different watches (three wrist watches an a pocket watch) were each measured one after another. You can see that the beat error and rates are a little different for each one. But each watch shows the basic regular pattern.
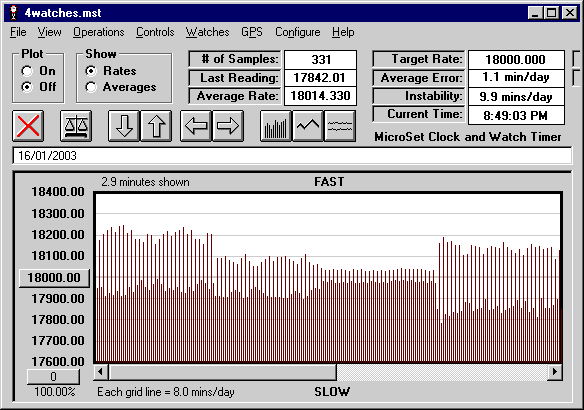
The graph above was captured using the standard clip-on acoustic pickup that’s included with each MicroSet. It can be clipped on to the winding stem, the case, or the bow of a pocket watch. Each location will produce different results, and you need to find the location that produces the best result on that watch. We make two special watch sensors that will give better results. We also make an inexpensive flat disk sensor that can be used with watches. The graph below shows the same four watches as above (in a different order) measured with the flat disk sensor. It helps to use a small weight to hold the flat disk sensor to the watch, or to hold the watch against the flat disk sensor.
